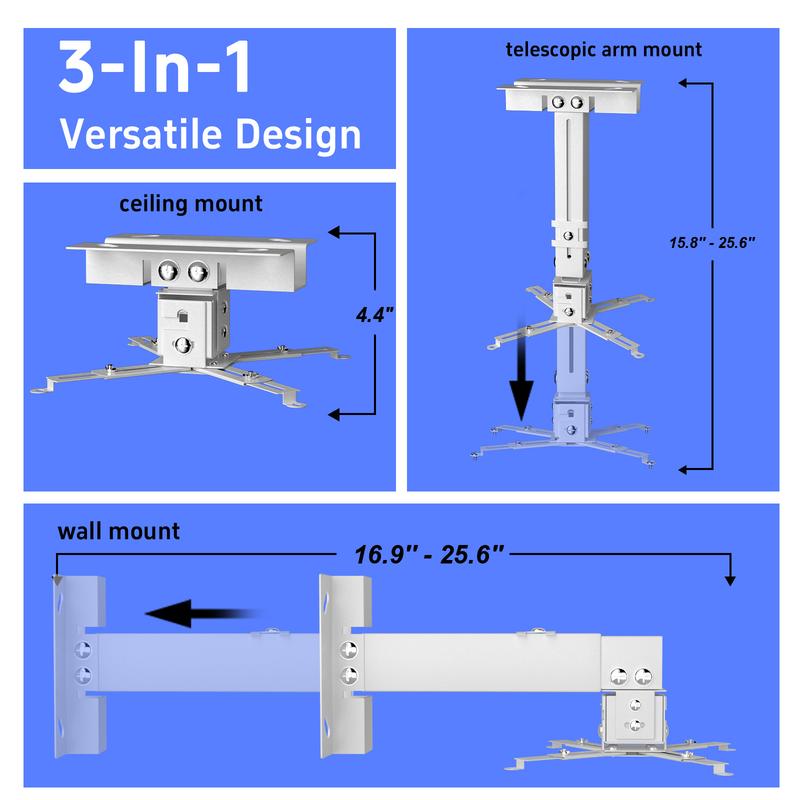
Versatile 3-in-1 Design: Whether you prefer recessed ceiling mounting (minimum length: 4.4 inches), telescopic arm ceiling mounting (height adjustment: 15.8 inches - 25.6 inches) or wall mounting (extension: 16.9 inches - 25.6 inches), SCREENMAX's mount can meet your needs.
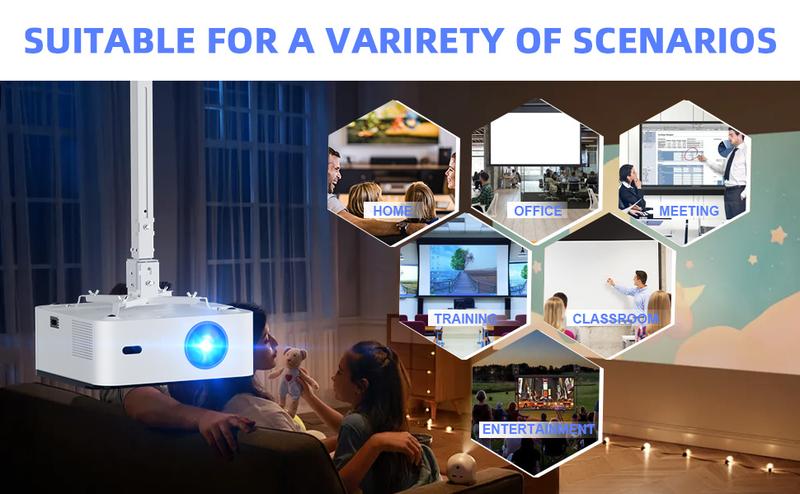
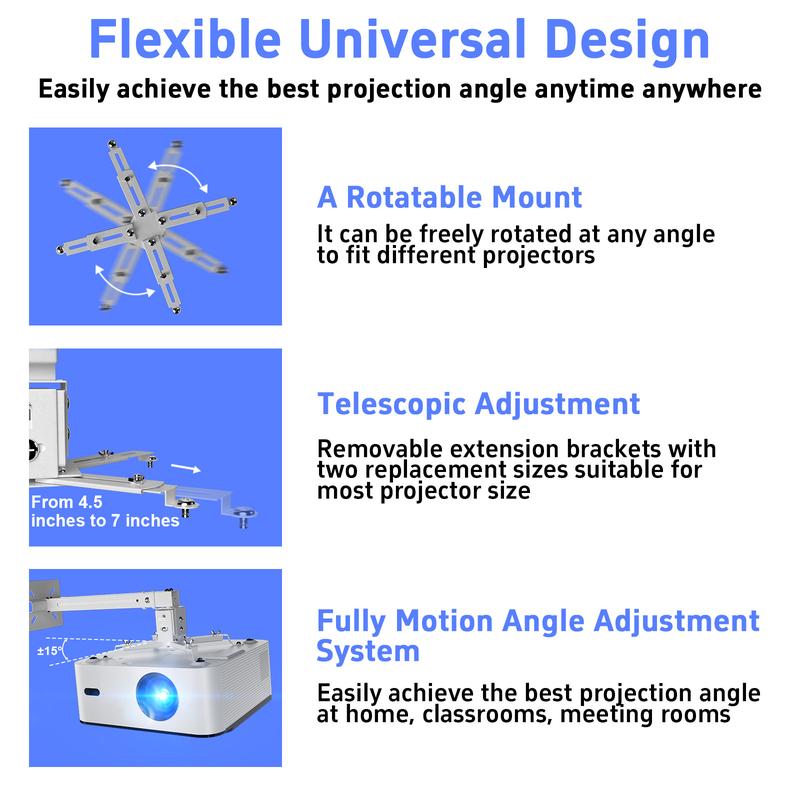
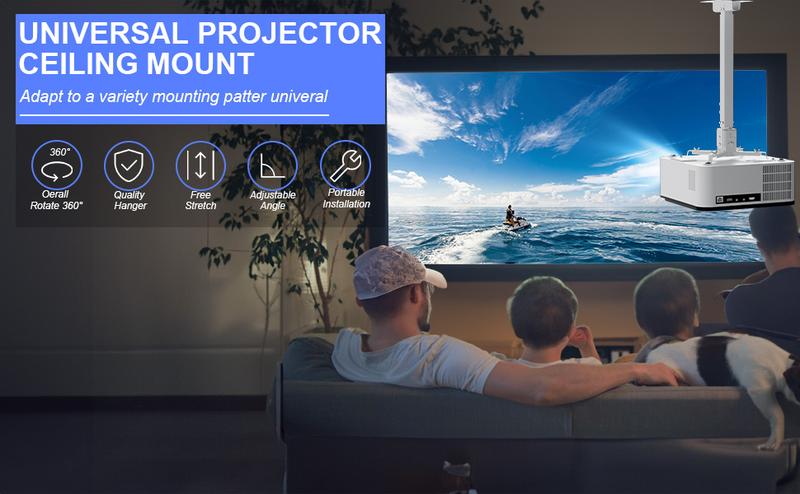
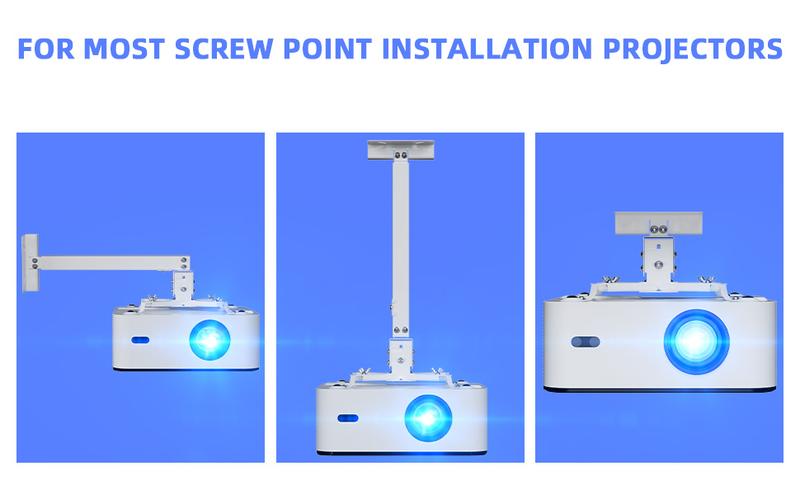
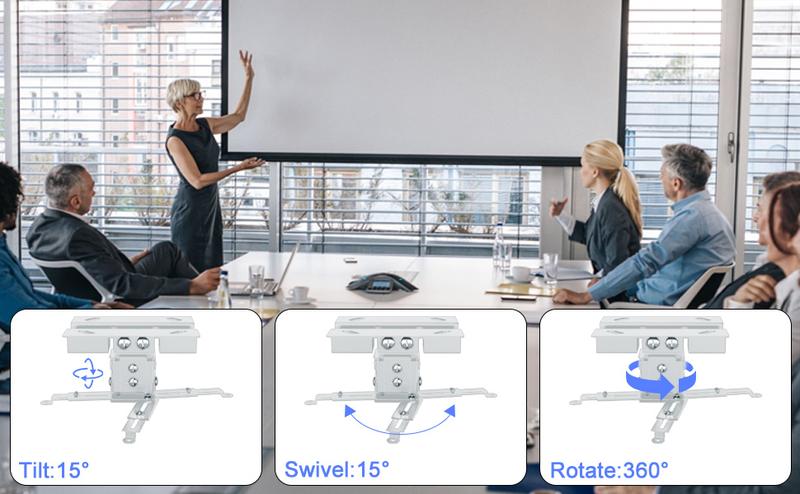
Flexible Universal Design: Projector mount With 3-4 mounting holes, the mounting hole spacing can reach 14.2'', compatible with Epson, Optoma, Benq and most projectors. You can tilt the projector +/- 15°, swivel +/- 22.5°, the main axis rotates 360°, easily achieving the best projection angle, can be used in classrooms, conference rooms, homes, etc.
Stable, Upgraded Cable Management: Ceiling mount's unique reinforced screw holes support the projector firmly. The large square tube design easily fixes and protects HDMI, audio and video cables, eliminating clutter for every home theater time or business presentation
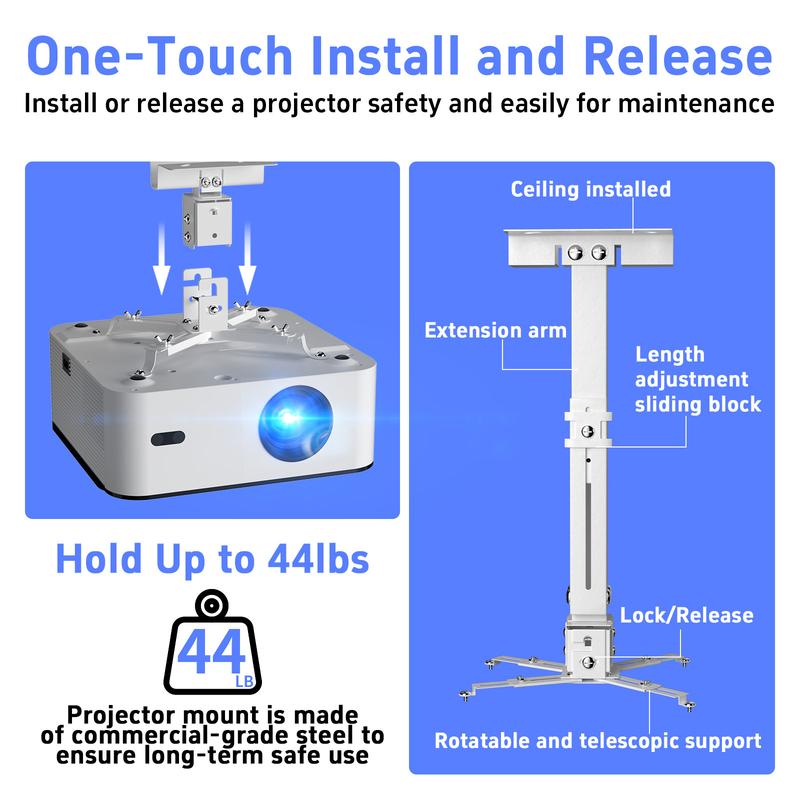
44lb Load-Bearing, Ensure Safety: SCREENMAX projector mount is made of high-strength commercial-grade steel, can stable support 44lb projector, Ordinary mounts only bear 20-30lbs, effectively avoiding deformation or damage caused by insufficient material strength, ensuring long-term safe use, an ideal choice for projection enthusiasts.
One-Click Installation and Release: Projector holder quick release system makes it easy to install and release the projector, without the tedious process of completely disassembling the entire mount, daily maintenance (such as replacing filters, lamps, etc.) is also more convenient. The exclusive "anti-slip" adjustment system locks the projector firmly in any position.
Professional Customer Support: Please make sure the projector has 3-4 mounting holes and the screw hole diameter is 3mm, 4mm or 5mm before purchasing. If the product doesn’t fit your projector, or if you have any questions about the product (damaged or missing accessories, installation problems), please feel free to contact us, we will reply you within 48 hours!
Stable and Upgraded Cable Management
SCREENMAX projector mount adopts an innovative design, and the unique mount reinforcement screw holes ensure that the projector is stable and doesn’t shake. The large square tube structure can easily fix and hide HDMI, audio and video cables, so that every home theater time or business presentation is free from cable clutter, enjoy a neater and more efficient viewing and presentation environment.
Super load-bearing, Safe
Made of high-strength commercial-grade steel, projector holder has a load-bearing capacity of up to 44lbs, far exceeding the 20-30lb standard of ordinary stands. even heavier projectors can be firmly supported, effectively avoiding deformation or damage, ensuring safety and reliability for long-term use.
One-click installation and release, easy maintenance
The ceiling mount is specially designed with a quick release system to make the installation and removal of the projector simple and quick. Installation can be easily completed without the tedious disassembly process, and daily maintenance such as replacing filters and bulbs has also become more convenient. the exclusive "anti-slip" adjustment system ensures that the projector is firmly locked in any position, making it safer to use.
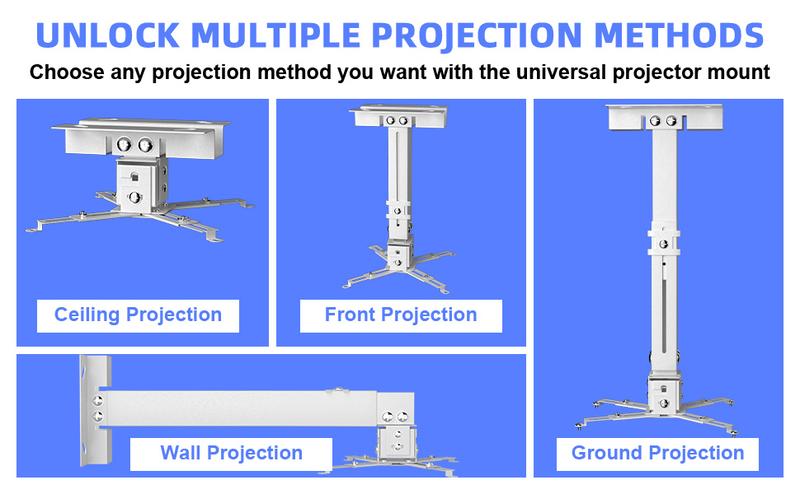
Unlock Multiple Projection Methods
SCREENMAX projector mount can choose ceiling projection, front projection, ground projection, wall projection, and multiple projection methods provide you with more flexibility and choice space. According to different site conditions, audience position and light environment, you can choose the most suitable projection method to achieve the best visual effect.
Multifunctional 3-in-1 Design, Free Installation
No matter what your space layout is, SCREENMAX can meet your needs. Supports embedded ceiling mount installation(minimum length 4.4 inches), telescopic arm ceiling mount installation (height adjustment range 15.8 inches-25.6 inches) and wall-mounted installation (extension range 16.9 inches-25.6 inches), flexible and changeable installation methods, making projection more free.
Flexible and Universal Design, Wide Compatibility
SCREENMAX projector mount has 3-4 mounting holes, and the spacing between the mounting holes can reach 14.2‘’. It is widely compatible with most brand projectors such as Epson, Emerson, BenQ, etc. It supports projector tilt +/-15°, rotation +/-22.5°, and 360° rotation adjustment of the main axis, easily achieving the best projection angle, meeting the projection needs of various occasions such as classrooms, conference rooms, and homes.
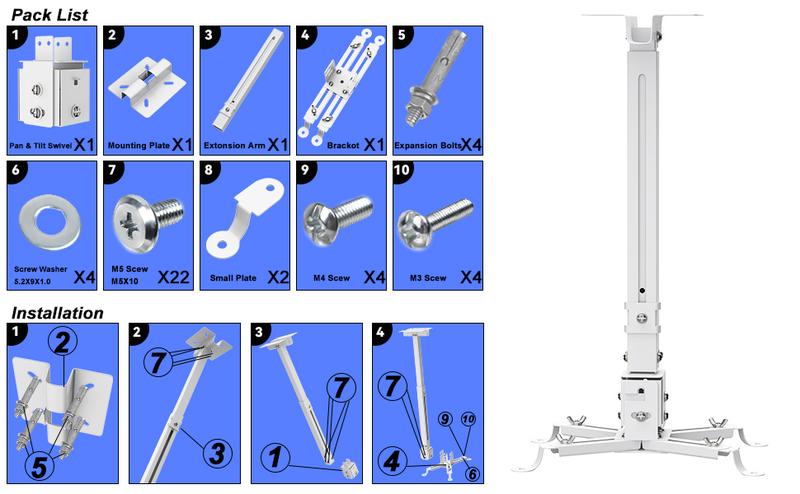
Package List and Installation Guide
Please don't be overwhelmed by the number of parts,the specific list is as shown in the picture,please check carefully (if you find the parts broken or missing please contact SCREENMAX in time)
In addition to the accessories, please prepare your own necessary tools, such as pliers, screwdrivers or drills for smooth installation.
Detailed installation guide:
Step 1: Use the mounting plate with the expansion bolts to mark a position you want to install the projector.
Step 2: Use the M5 screws to screw the mounting plate with the extension arm. The extension arm is stretchable, you can adjust it to a proper length by losing the screw on it.
Step 3: Insert the Pan & tilt the swivel into the bracket and fixed them with M5 screws, tighten all the screws with your screwdriver.
Step 4: Use the M5 screws to connect the extension arm with the bracket, align the holes, fix them with the M5 screws, and then tighten them with your screwdriver.
Step 5: Connect the finished bracket with the projector. Needs to use M4 screws(Some projector fits the M3 screws) and the screw washer. The Bracket is expendable and stretchable, align the holes on the long plates with the mounting holes on the projector top to check if they fit each other. If the bracket doesn't fit the holes, you can use the 2 small plates to do the trick. (Lose the nuts on the long plates and took them out, use the M4 screw to fix the small plate according to the holes on the projector. Insert the small plate into the bracket, and screw the nuts a little bit). Adjust the angle of the bracket as needed, then insert another two screws into the projector. Tighten all the screws with your screwdriver, and then tighten the nuts.
PS: Before fix the projector on the ceiling or wall, please take it with the mount to the ceiling or the wall, then power on the projector to check the best projection position. After selecting your ideal position, mark the holes with a pencil, then drill four holes in the ceiling or the wall based on the marks, and fix the projector with the expansion bolts.
Finally, fix the mounting plate with the expansion bolts.